Friday, December 8, 2017

Tea Too!

I made two cards for the 2017 Winter Coffee Lover's Blog Hop!

The second one is a tea card.


Hope you all have plans to spend Christmas with family and friends. Merry Christmas!
Until Next Time~
Shari

Coffee Card

I made two cards for the 2017 Winter Coffee Lover's Blog Hop!

First one was a latte fun! :)


Don't forget to check out the next post to see my tea card too!

Until Next Time~
Shari

Monday, December 4, 2017

Mixed Media Christmas Card Challenge


These are some of my favorite colors for Christmas! Silver is the best!

I made this card with a die cut poinsettia with vellum, holly berry embossing folder, and silver Colorbox ink, with a little glue and bling. Here is my entry-


Wishing everyone a very Merry Christmas!

Until Next Time-
~Shari


Monday, November 6, 2017

"stART With A Photo" ART Challenge #5

Hello again! Welcome to our Monday "stART With A Photo" challenge #5. I am still plugging along, even though no one else has played along yet! I will not be deterred! haha

So, if you are still reading, why not consider stARTing your week with an art challenge?

This week's inspiration comes from a greeting card a friend sent me. I thought the little girl pictured on the front was pretty, and I have a thing for wells. Is that weird? Anyways-


I was inspired by the colors this week, but also since I haven't felt well lately, I used my Sizzix Framelits Flip-Its die, to create a couple get well cards.


I have been making a lot of cards lately, but remember you can do any project!

Enjoy yourself. Be creative. Share your link in the comments. Please visit some of the other participant's blogs and leave them some love too!

Thanks for playing along!


Until Next Time-
~Shari


Wednesday, November 1, 2017

Messy Christmas To You!

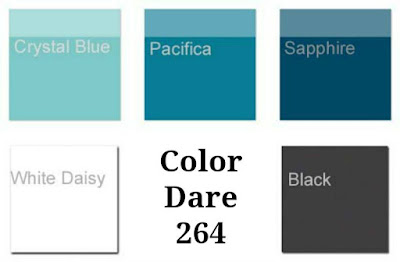
Hello! I am just completing the last few cards out of the 80 I made for Christmas this year. I decided to try something new. I have been waiting to buy and use some gilding flakes for the past couple of years, so I went ahead and ordered two colors of flakes and some glue. Also, I am entering another challenge, so if you want to see that entry, it is the last card at the bottom of this post!

First, let me say, that gilding flakes make very pretty backgrounds, accents, etc. BUT they are so MESSY! I mean really messy, like in a tarred and feathered kind of way! This process might just be worse than the dreaded craft herpes....GLITTER! LOL

Seriously though, I advise following all the advice on YouTube and Pinterest from more seasoned professionals than myself, but here are a few tips I learned:

1st- Be sure your work space is large and clear.

2nd- Make sure there is no breeze, fan or movement of air. In fact, it might be a good idea to hold your breath once you open the jar of gilding flakes!

3rd- Don't use your finger to rub off the excess. (Just trust me on this)

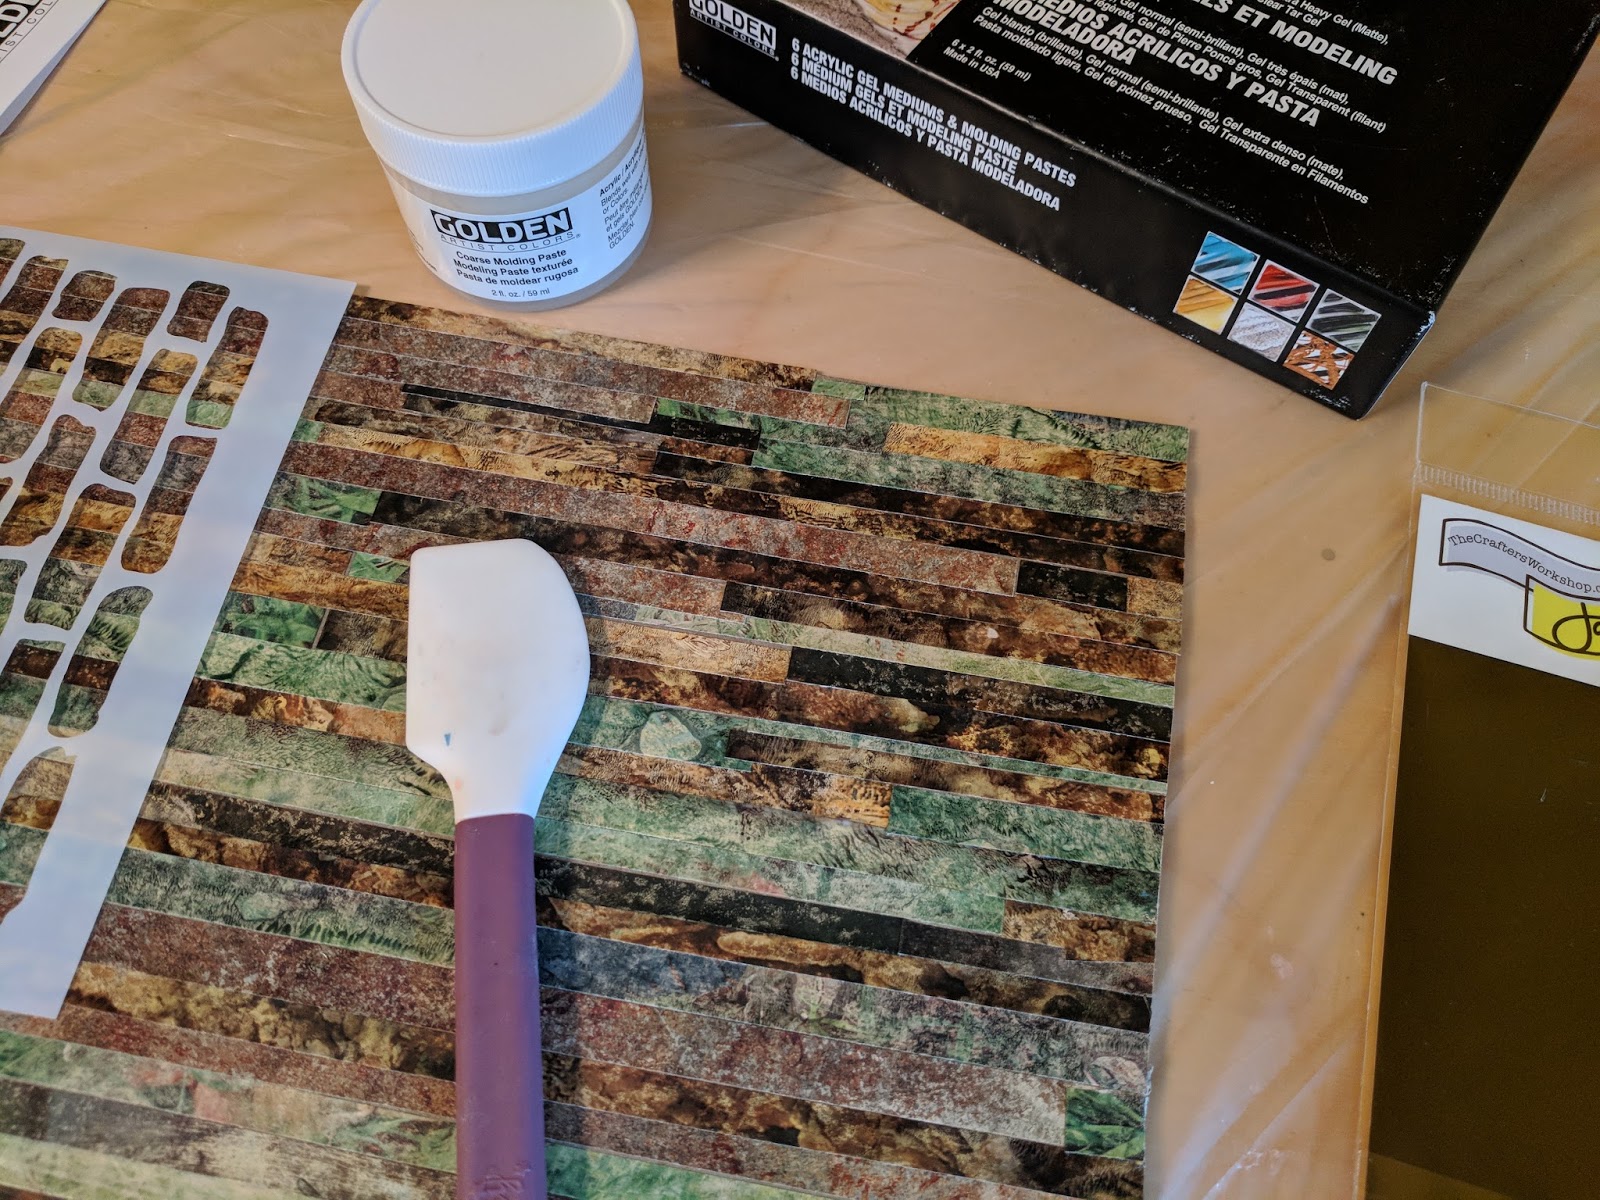
4th- Foam brushes work great for applying the glue and for rubbing over the gilding flakes. They are great for lots of crafty projects, and cheap too!

5th- Just know that there will be a mess of poofy, light flakes, and possibly some glue all over your work space, and the floor. 

6th- On my first card, I put glue on a stamp, and then stamped that on the paper. In an effort to preserve glue, I applied a thin layer on the stamp and stamped the image....and then the stamp stuck to the paper....and then there was a lot of frantic activity to save the stamp, which in turn spread the flakes all over because of the whirlwind of my movements. Good news, it cleans off nicely with soapy water!

7th- When using the glue with a stamp, be sure to apply a THICK layer of glue to the stamp to avoid the mishap above. Also, keep the lid on the jar until you are actually ready to add them to the paper with the dried glue!

All things considered, I like the way they turned out, and will do it again, mostly because I still have a lot of gilding flakes and glue left. Hopefully, I will get better with practice!


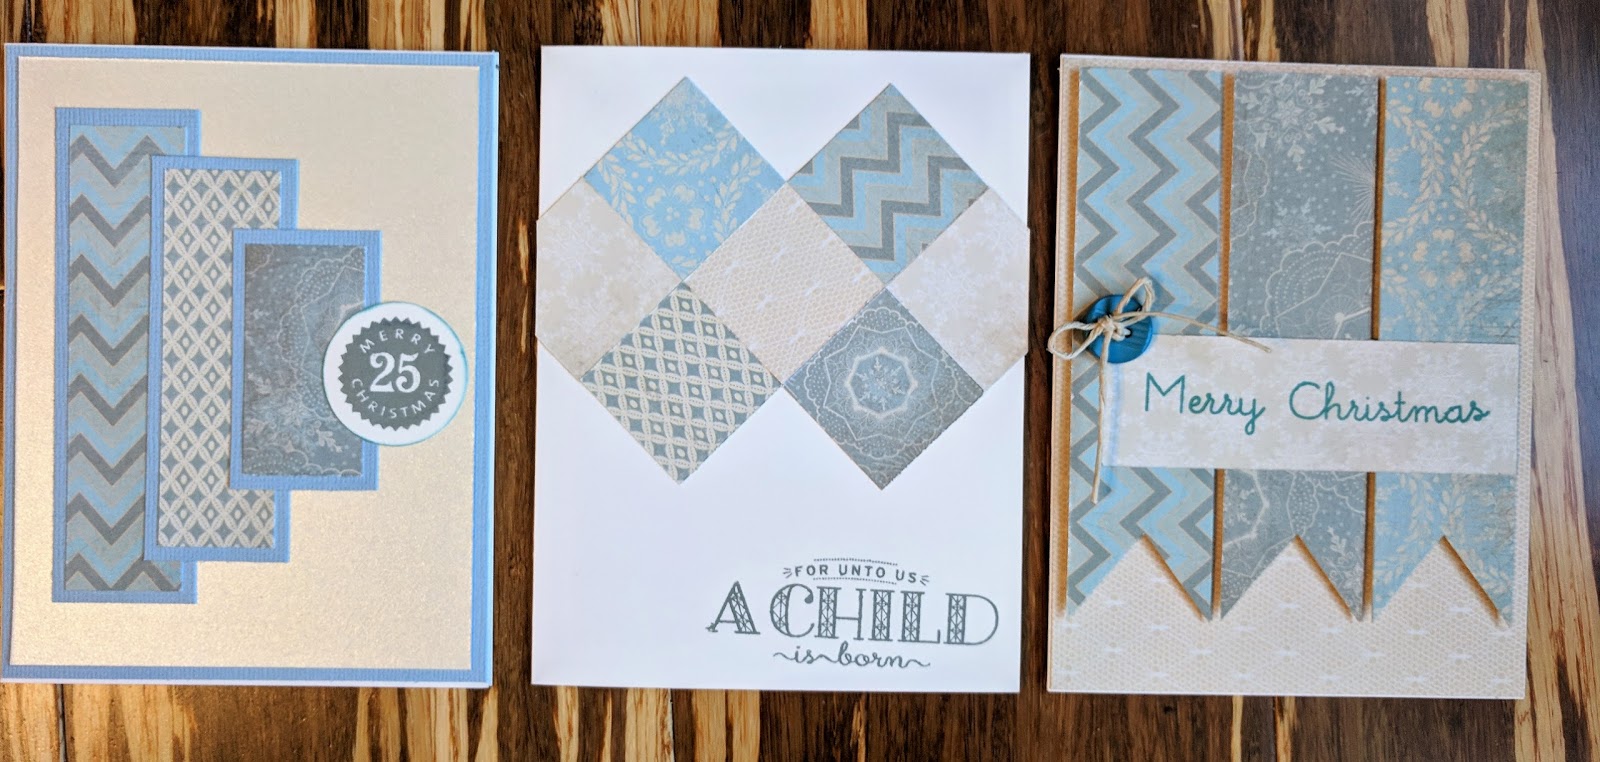
This first one is the one withe the distressed stamped background and "Mulled Wine" flakes.


Then I tried used the "Aurora Lights" flakes to make these two cards-


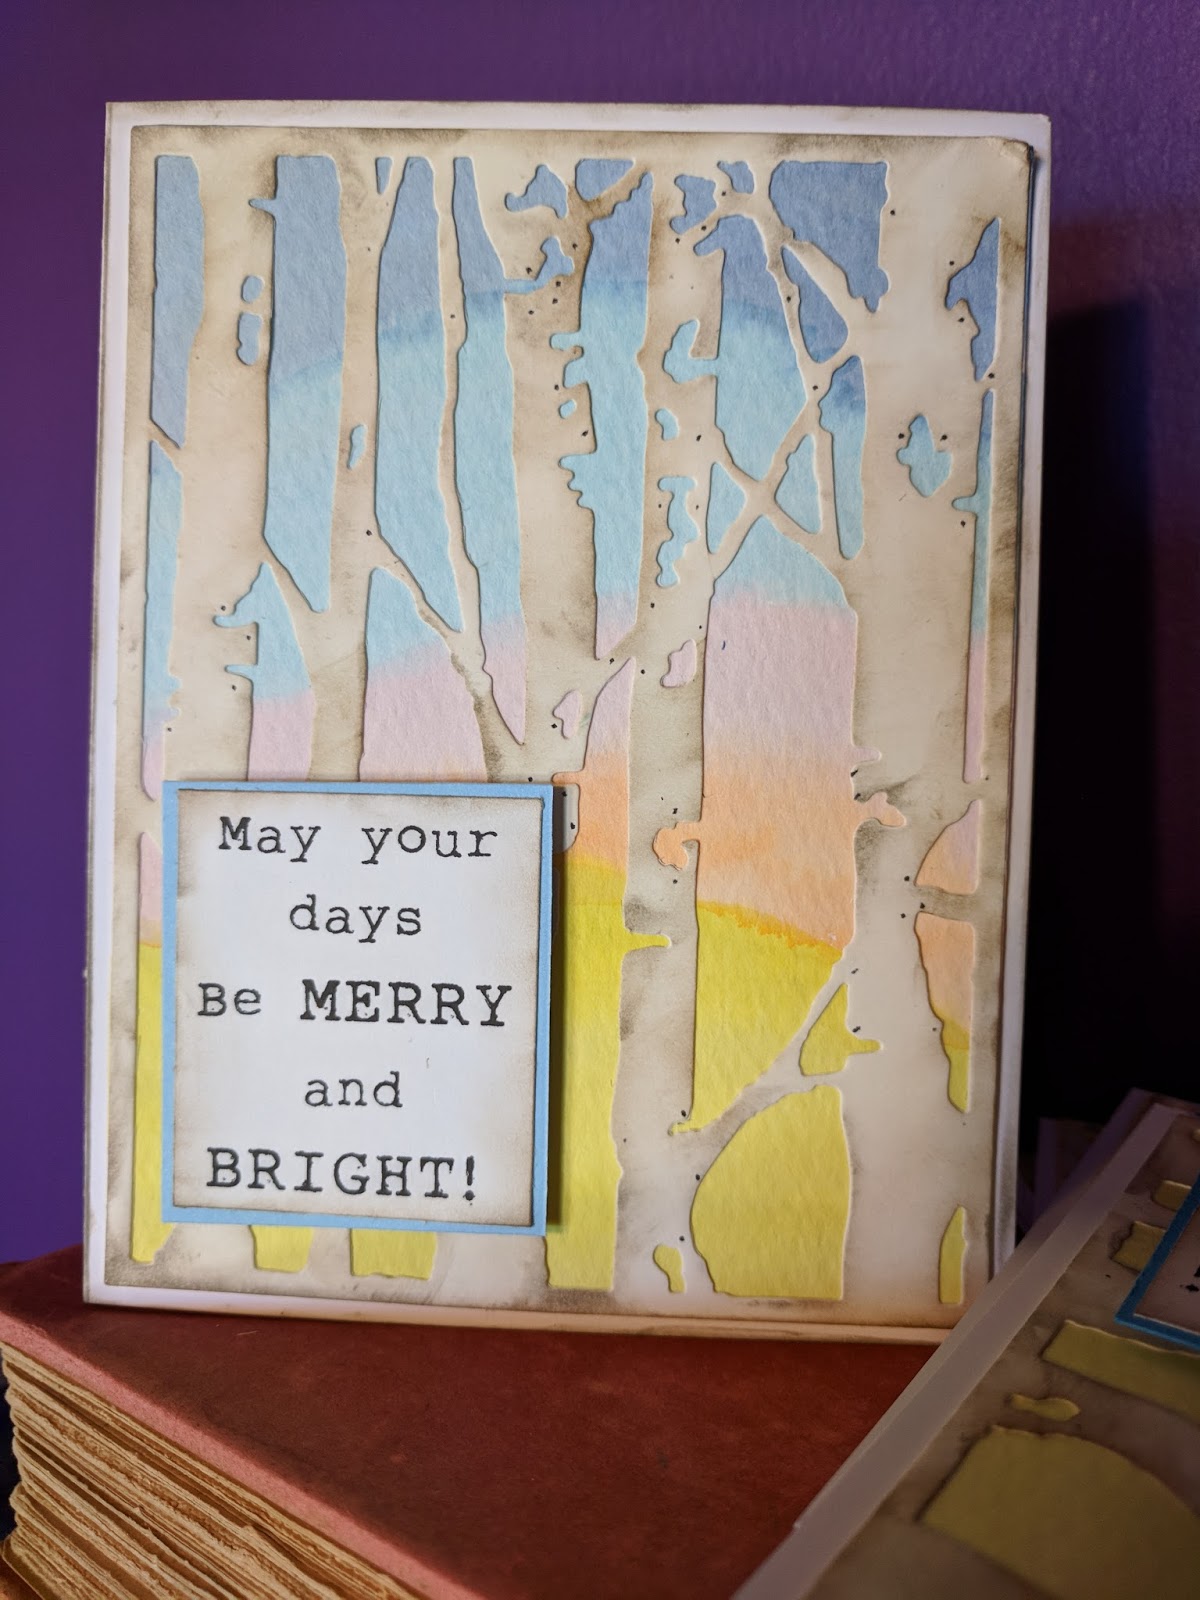
The first one with the sentiment die-


This last one is my entry into the Mixed Media Monthly Challenge # 42


It is using the die cut "silhouette" from the first card, and the gilding flakes added to the background.


Until Next Time-
~Shari


Monday, October 30, 2017

"stART With A Photo" ART Challenge #4

Hello! If you are like me, you probably aren't a huge fan of Mondays! However, if you play along with us every Monday, you can stART your week with a challenge. Art makes everything better, even Mondays!

stART with a Photo Challenge #4


This picture was taken by me while our family was serving at a camp for families with disabilities. We were all praying and holding hands. It reminds me of the love of friends. So, I have this special birthday card as my project for this week's challenge.


Enjoy yourself. Be creative. Share your link in the comments. Please visit some of the other participant's blogs and leave them some love too!

Thanks for playing along!

Until Next Time-
~Shari


Thursday, October 26, 2017

Same Paper - Different Cards

Hello and thanks for stopping by! I am still hard at work making Christmas cards, so I thought I would show you a few more. I had lots of scraps and a few larger pieces of an old CTMH Christmas paper pack left, and decided to use the rest of it.

Here are the cards I made using the remnants-


This last one is my favorite, but had to toss in a few other colors to cover the whole card.


Don't forget to check out our weekly art challenge. There is still time to share your projects! 


Until Next Time-
~Shari


Tuesday, October 24, 2017

Impatient Alcohol Background

Alright, I admit it. I am impatient. So, when I saw the new Mix-Ability Challenge at Splitcoast Stampers, I wanted to try the alcohol background technique right away. The trouble is, I don't own any alcohol inks, so I made up a different way to do it.

I poured a little rubbing alcohol in a shallow styrofoam tray.

Then dripped in some Distress Inks. They sank straight to the bottom of the tray. Hmmmm


Doing this technique the right way, keep the alcohol ink on top of the water in the dish. You lay the paper on top and pick up the ink. Since that wasn't going to work, I dipped the paper in and pressed down to get it to the ink on the bottom. I smooshed it a few seconds and brought it up. I used one sheet of water color paper (the larger piece). I used a few scraps of white cardstock too, before the alcohol go "muddy" from the ink.


Here are the two cards I made once the paper dried-


Until Next Time
~Shari

Monday, October 23, 2017

The Challenges Continue!

I have been having fun playing along with the Color My Heart Color Dare Challenge Blog. Some times it is helpful to get a little inspiration from a creative prompt!

I decided to try some clear embossing powder with a water color background, using the colors from challenge #265, but didn't like the way it looked. I tossed the background in the recycling bin, and started over.


This time I tried silver embossing powder and colored pencils instead. Here is my card for Color My Heart Color Dare Challenge #265-


When I finished that card for the challenge, I realized that the now dried first background didn't look horrible, so I made that into a second card!


I also made a card for Color Dare #266, since I was working with similar colors already.


Here is what I came up with for this challenge-


Don't forget to check out our weekly challenge! You don't want to miss it! :)

Until Next Time-
~Shari


"stART With A Photo" ART Challenge #3

Hello! Welcome to our weekly art challenge. Hope you had a restful weekend and are ready to get back in your craft room and make something!

Every Monday, you can stop by the blog for a little creative prompt, so you can stART your week with a challenge.

So, without further ado, here is this week's-

stART with a Photo Challenge #3

This week's challenge is inspired by the remaining blooms in my garden. You may have guessed by now, that purple is my favorite color, so these caught my eye. I hope this inspires you to create!


This week I was inspired to try something new. I have never made a collage before, and I had some Citra-Solv papers that I made a while ago.


To make these, you just need an old Nat Geo magazine, gloves, a brush, and Citra-Solv.  Apply it liberally, close the magazine and leave it for a while to soak. Then lay the pages out and let them finish drying. More details are available on their website. This was the first time I tried it and got some great results, but the pages have been laying on a shelf for a long time waiting to be used. 

I decided to try a collage this week. I have never done one before, and thought it could be fun, which is the #1 rule for this challenge, so I knew I was on to something!

I cut the pages into various size strips, and glued them down with the Mod Podge.


This dried very fast with the window opened. I used coarse paste with a rubber spatula and brick stencil to add texture.


I let the paste dry for a few minutes, and then sprayed it with the Glimmer Mist, and set the whole thing aside.


Next, I tore some pieces of the Citra-Solv papers to make flowers and stems, and glued them to scrap paper for a firm backing.


I glued those to the background, and set it in front of the window again to dry. I grabbed my floral wire, and of course, made a flower with it! I used some new sheets of my Citra-Solv papers to make a background for the wire flower.


I used the tacky glue to attach the wire flower to the chipboard, and held it down with books for several hours to let it thoroughly dry. I used the sharpies to "doodle" an outline around all the flowers to give them some definition. I used the hot glue gun to make dots in the center of the flowers, because I wanted to see how it would look, and this was a fun project with lots of new techniques to try, so why not? Lastly, I glued some torn book pages to the top of the collage and finished it off with the reminder to "Bloom where He has planted you." Some times it is easy for me to feel isolated and think that I have nothing to offer. I need to remember that even if I can't do the things I used to, I can still be useful right where God has planted me. Sometimes that looks much different than I would have hoped for, or chosen, but it is right where I need to BLOOM and grow.

Here is my finished project for this week's challenge-


Enjoy yourself. Be creative. Share your link in the comments. Please visit some of the other participant's blogs and leave them some love too!

Thanks for playing along!

Until Next Time-
~Shari


Friday, October 20, 2017

When Life Hands You Ugly paper...

My usual style would be to use neutral and/or dark colors. I like distressed and torn edges. I usually avoid pastels, busy patterns, and bright colors. However, last January, I found a few 6 x 6" Christmas patterned paper pads in the bargain bins at Target, so I bought a couple. Since I am neck deep in making Christmas cards right now, I have a desk full of Christmas paper trying to come up with card ideas. Now that I am actually looking through the paper in those pads, I realize I am not a huge fan of the bright patterned ones! What a dilemma. What's a girl to do with a stack of paper she doesn't like?? Well, for some reason ugly Christmas sweaters came to mind. Of course, I headed straight to my ol' buddy Google and searched for "ugly sweater Christmas card ideas."

I found a few I liked, and combined a couple of those sketches to make these cards.


To be honest, these are some of my favorite cards so far! That paper I didn't care for too much actually makes pretty ugly sweaters. I would actually wear one! :)

I typed and printed the sentiment on card stock. I used a sweater SVG cut file, and glued the layers together. All the paper was from my scrap pile, except for the patterned paper that lead me in this direction to begin with! Super easy and fun design.

Hope you had some time to get into your craft room this week. I would love to see what you are working on! Don't forget, there is always inspiration to get you started on our Monday challenge posts!

Until Next Time-
~Shari


Wednesday, October 18, 2017

Pastel Christmas

My use of non-traditional Christmas card colors continues! Not sure how I got going in this direction, but kind of like stepping out of my comfort zone! I found a challenge with some bright colors, and decided to use those for my background.


I started by cutting the birch tree die, using a black pen to add small dots, while pushing it out of the die.


 Then I edged it with Distress Ink Pumice Stone and Walnut Stain.


 I grabbed some background colors (Dried Marigold, Crushed Olive, Stormy Sky, Tumbled Glass, Milled Lavender) to represent land and sky behind the trees, and used them on watercolor paper with a brush and water.


I typed up a sentiment that seemed to go with the "bright" colors, and assembled the cards. 


So for the Mixed Media Challenge #41, here is the finished project! Not exactly all the colors, but the closest that I had available. Definitely not my normal style :)


Until Next Time-
~Shari


Tuesday, October 17, 2017

Woot Woot!

I had a wonderful surprise this morning upon checking my Facebook news feed, and seeing that I won the challenge over at Color My Heart Color Dare Blog. (see my entry here)
Although they spelled my name wrong "art 4 assessibility", it was a nice surprise! For the record, every time I type "accessibility", I have to double-check the spelling too! LOL

Since my first challenge went so well, and I had an idea for a card, I thought I would try again.

So the new Challenge #264 over at Color Dare is this:
#264 Open -  Closes Oct 19th

This is my card for the challenge-


Pretty easy to make! 

Until Next Time
~Shari

Monday, October 16, 2017

"stART With A Photo" ART Challenge #2

Hello! Welcome to our weekly art challenge! Each Monday, I will post a photo with some color and word prompts, so you can stART your week with a challenge.

This is an "anything goes" art challenge (any format/medium). The purpose is just to give you a push to get creative- art, crafts, DIY projects. Just use the weekly photo, color scheme, and/or words to get you started. There is no right or wrong way.

Does the photo remind you of something else? Provoke an emotion?

You can use any or all of the colors, objects, words, etc or none at all! Think outside of the box, and be sure to share your creations with us!

There is a tab with the challenge rules, but the most important rule is to have fun! I would appreciate if you link back to my blog too.

stART with a Photo Challenge #2

This week's challenge is inspired by this very old photo of the hubby and I all dressed up for a renaissance costume wedding. There are a lot of colors and things going on in this photo, so I thought it would be fun to see all the various inspiration!


Since I have 80 Christmas cards to make this year, I decided to use these colors (most of them anyways), and the leaf inspiration to make a few cards. Here is my project for this week's challenge-


I used the Neenah card stock and embossed it with a Christmas folder. I used several colors of distress ink to color the raised embossed areas. After gluing the card stock onto the card, I edged it with "walnut stain" distress ink. I stamped the sentiment on scraps of white card stock, and mounted them on black shimmer paper.

Next, I used two shades of green shimmer card stock to use the leaf dies. I tied the paper twine into tiny bows, and used liquid glass adhesive to hold that all together on the card. I stuck the sentiment on with 1/2" squares to give them a raised appearance. Supply list below!

No one played along with me last week, for our first challenge! Hopeful someone will be inspired to create and share! 

Enjoy yourself. Be creative. Share your link in the comments. Please visit some of the other blogs and leave some love!

Thanks for playing along!

Until Next Time-
~Shari


Saturday, October 14, 2017

Gelli Christmas

Hello! Hope you get into your craft room a while this weekend! It is raining a LOT here in Chicagoland. Forecasting more than 3" before it ends, and we are already having sump pump issues. Uggh! Thankful the hubby is here to take care of that, so I can sneak away and work on some Christmas cards! hehe :)

I had my first set of Gelli prints I ever made laying around, and figured I should use them! This isn't typical Christmas colors (at least not for me), but lately I have been living on the artistic wild side, so why not? haha


I made a half dozen cards, using three different design ideas. I used the gelli prints for the background. I used the markers to draw outlines. and held the snowflake on with an eyelet. Pretty simple! What are you making today? Leave a comment and show us!


Until Next Time-
~Shari