Friday, September 29, 2017

MFT Card Challenge

Sometimes, you need a little inspiration to get into the craft room and create something. Today, the MFT Card Challenge #78, was just what I needed!

These aren't my normal colors, as you know I like a little grunge :)


So I matched the colors the best I could, and got lost in my craft room for a bit. Had to still add a little grunge, so I edged the papers with matching inks, and tore a couple layers. Not too bad for my first card challenge.
(I am not a great photographer, and the poor lighting combined with my cell phone camera, sure makes this navy blue look black!)


Until Next Time
~Shari

Thursday, September 28, 2017

Stuck in A Purple Rut

I have been feeling a little better, and have gotten back into the craft room the last few days. It seems like the color purple manages to work it's way into almost every project! Hmmm...

You might remember this sheet of watercolor paper I used to clean up the paint after a tried pour painting.

Once it was all dried, I made a couple different style cards using the paper.


 Over the weekend, I decided to try painting a flower, on a canvas that had some background paint on it from another project I made for a special order.


This is a 12 x 12" canvas - acrylic painting. 

Today I made a few more cards, and they didn't all have purple in them, but this one did. I was playing with some water and markers for the background. This is definitely an activity I need to practice more!

Hope you are all having a great week!


Until Next Time
~Shari

Saturday, September 23, 2017

I Am Grout (Sorry I Couldn't Resist)

It was a rough week! My first infusion on Monday, September 18th, took the wind right out of my sails. Haven't been in my craft room at all, so there hasn't been anything to post.

Last week, we got our window hung up in our living room, and set up a light behind it.


Next, I started worked on the other vintage, farm window I was given. I managed to get all the glass, tiles, ceramic, and rocks glued down. It had plenty of time to dry while I rested this week. The picture still shows the wet, white glue. Don't worry, it dried clear!


Today I got the grout done, and now it just needs a little buffing after it dries more, then we can add a couple of screw hooks and the chain to hang it.

Pictured here back lit from sunlight, no filter on the camera.

"Hillside Path on a Sunny Day"

It will take a couple days to dry and get the finishing touches add.

Thanks for stopping by!
Until Next Time-
~Shari

Wednesday, September 13, 2017

Window Panes

Any of you who have been on Pinterest know how quickly your boards, full of creative ideas, can get out of hand! I had a board with lots of ideas for using an old window. The only problem with actually utilizing any of them was the fact that old windows are so "in style" they have become expensive to buy at an antique shop or flea market, so I just kept pinning projects for "some day" when I have a window.

A couple weeks ago, a family that my daughter knows asks if she wanted any old farm windows. She said yes, and brought two of them home for me. FREE!! *happy dance* Now I had to actually wade through my long list of possibilities and choose one. This is the final project I am making for our living room walls, and thankful it is done and ready to be hung up!


Starting with a sketch for an idea of what to do placed under the window, I began to glue the pieces of the tree to the window panes.


I then filled in the sun the sky and added some ground and a river. I am sure that is all very obvious just by looking. haha


Once it was all glued down, and dry (48 hours), I started grouting. Left side is done, right side is not yet grouted in the photo above. Also, man, grouting is messy! 
*Note to self- do this outside next time like the website told me to do.


Here it is completely finished and photographed with the sun lighting from behind it. Hopefully it looks like an abstract landscape, because that is what it is supposed to be!

I still have the other window, which I plan to use to make another (different) mosaic piece. Look for the second one on the blog in the next week or so, as it will be available for someone wanting one (details will be given in that post).

Thanks for stopping by!
Until Next Time-
~Shari

Monday, September 11, 2017

Hang Ups

Hello! I have been spending a lot of time on that special project I mentioned last week. I had NO idea that it would be so labor intensive and take forever to dry. Hopefully by the end of the week, it will be hanging on the wall and ready to show!

This post is about hang ups! Picture hang ups, to be precise. haha I have my artwork framed and ready to be put in my living room-

I put the other 3 paintings in our frame so you could visualize how it might look on your wall. All 3 are still available on a first come, first served basis for a donation of $25 or more.

**Please note**Frame is NOT included. Any 9x12 frame will hold this canvas-board, which is slightly thicker than the glass in a standard picture frame. I chose to display it with no glass in the frame, since it is a painting, but you can try it with the glass still in too! 

All you need to do to get one of these paintings, is to leave a comment below and tell me which one you want, and then make a donation on my YouCaring page.


 I thought I'd leave you with a little sneak peek at the stack of Christmas cards I started making over the weekend. I have a couple dozen more to make, so I am off to the craft room. Bye for now!


Until Next Time-
~Shari

Friday, September 8, 2017

Turning An "Oops" Into Art

A couple days ago, I tried a new technique with paint. One of the canvases did not turn out the way I expected. Remember this-

So I decided after it was dry to try again, and just paint right over that mess. I mixed the same colors again, but with silicone this time, and tried the flip cup method to get the paint on the canvas.


I set the canvas on top of the cup.


I flipped it over, trying to keep some pressure.

Then lifted the cup.

I tilted the canvas to spread the paint, and used a heat gun to bring some of the bubbles to the surface from the added silicone. This is the finished project, and all that purple looks great to me! I have a frame picked out and will soon put this on my wall!

Of course, I used another sheet of watercolor paper to "mop" up the mess left on my work surface. I have three sheets now to make some cards with.....stay tuned!


Then I went back and added Polycrylic to the other three canvases to give them a bit of shine. These 9x12 canvases are ready for a frame.


Next week I hope to have a big reveal (even Chad doesn't know what I am working on)! Although he figured out I had a large sponge and some grout. Hmmmmm


Until Next Time
~Shari

Wednesday, September 6, 2017

Doodle All the Day

On days when pain levels are high, it is difficult to get much done. If you know me at all, I am not great at just sitting around or at letting myself nap all. So, I started doodling, doing adult coloring books, and crafting to help keep myself moving. This keeps me from falling asleep, and also keeps my mind active instead of concentrating on the pain.

I have watched several drawing videos, and worked through some lessons, but drawing is not a gift of mine. Doodling easier than actually drawing something, is fun, and I enjoy doodling on envelopes and postcards I mail.

Today, I dealt with the pain by using my tablet and stylus instead of paper and pencil. Here is what I came up with-

Maybe I could find someone to improve this design, a graphic designer that I know, perhaps? :) I think it would make a nice t-shirt! A purple one (of course) with white/negative image.

Sorry, but that is all I have for today. Tomorrow I am hoping to make something with the watercolor paper that I used yesterday to wipe up the left over paint.
Hope your day was better than mine! I appreciate your prayers. 

Until Next Time
~Shari

7 Colors, 6 Projects, and 4 Techniques

Trust me, the title of this post bugs me a lot! I really wanted to do 7 colors and 7 ways today, but I accidentally splatter painted my wall and floor while trying a new technique! By the time I got things cleaned up, I had run out of time and needed to get dinner started asap.

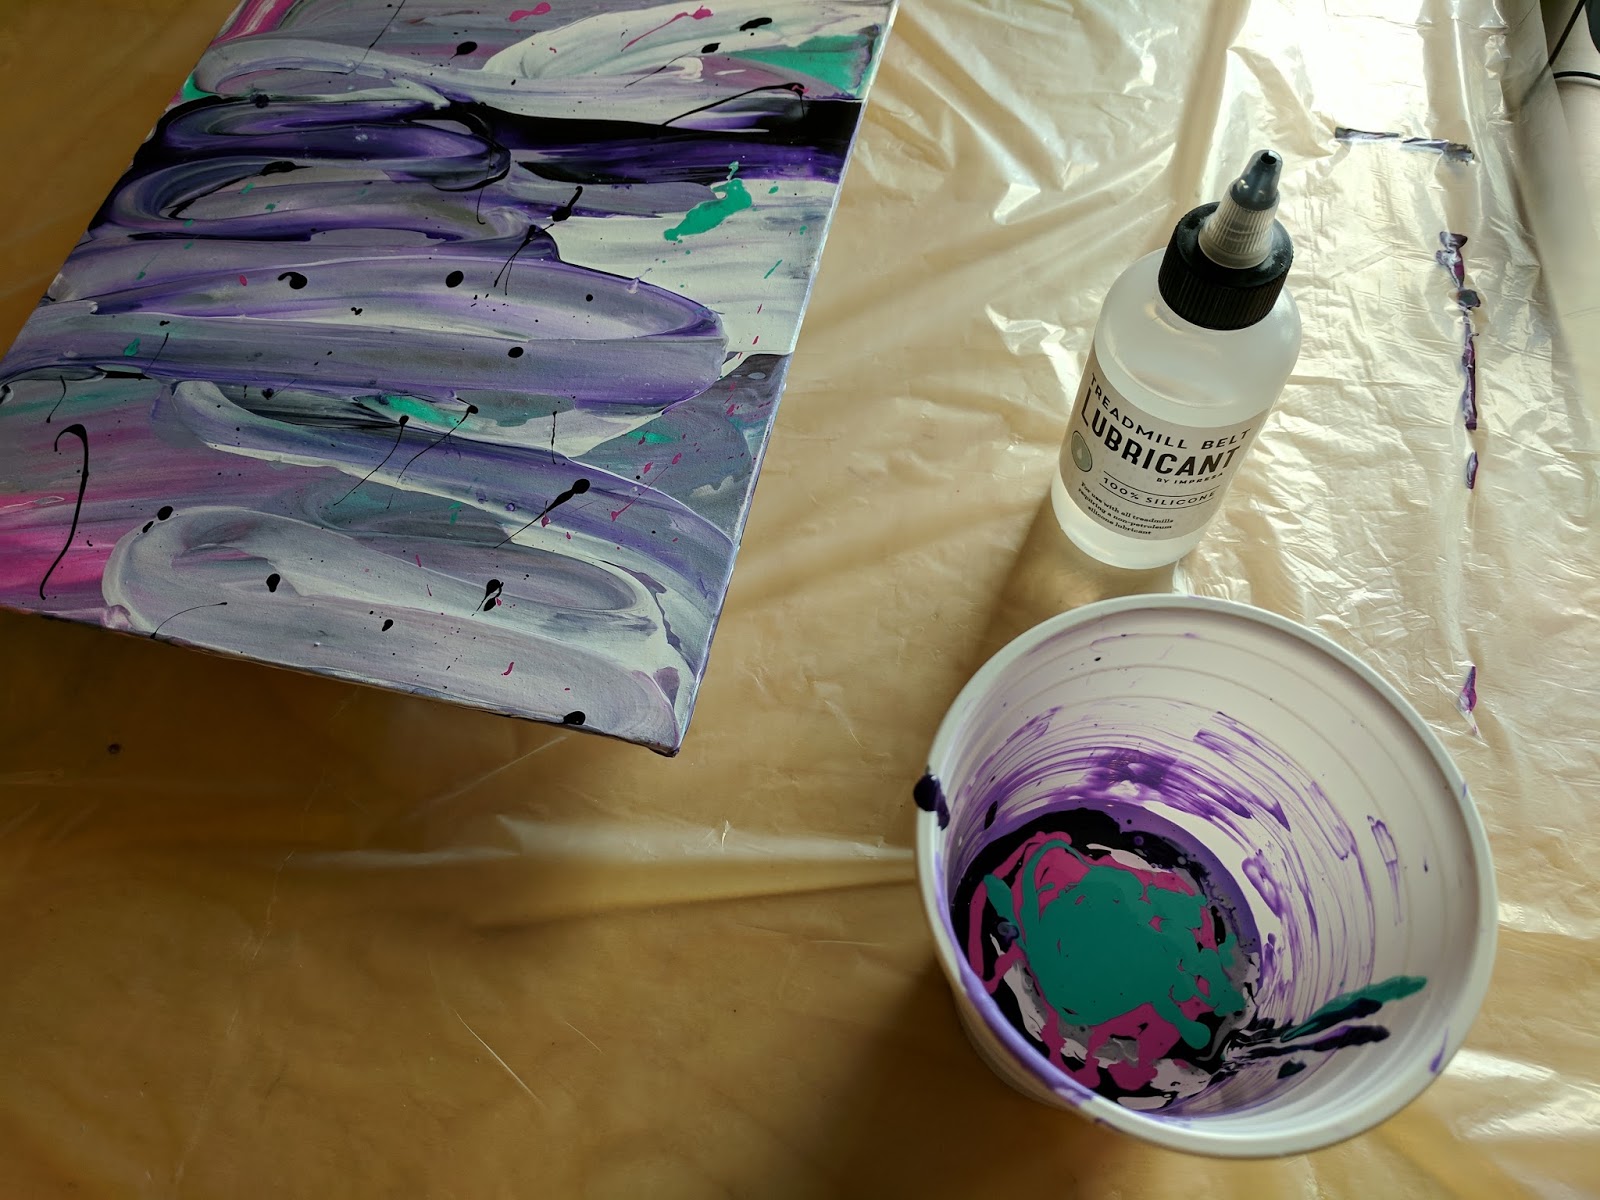
I recently watched several videos using a pouring technique with acrylic paints. So I gathered 7 paint colors, added some medium to keep the paint fluid enough to pour. (Main supplies listed at the bottom of the post).


Technique #1 involved pouring paint onto the canvas board (I used 9x12). Then taking a cake spatula to "swipe" the paint. Um, yeah, not sure that went very well for me. It might be because most videos suggested adding a silicone to the project, which I did not have, so....


For technique #2 I was supposed to layer all the colors in one cup and then pour those out onto the canvas. Then tilt the canvas various directions to get the desired effects. This was much easier, but again, without the silicone I didn't get the "bubble/cell" effect I saw in many videos. Since it was so easy, I tried a second canvas to use up more paint, adding a little alcohol to see what happened.


The third technique is to make a puddle of paint towards the middle of a canvas, and spin the canvas rapidly. I tried doing that on about a dozen different surfaces underneath, and could barely get it turning, and never achieved "rapidly," however, I did splatter paint the craft room walls and floors, as I mentioned earlier! This may be one of my favorites! (The painting not the mess haha)


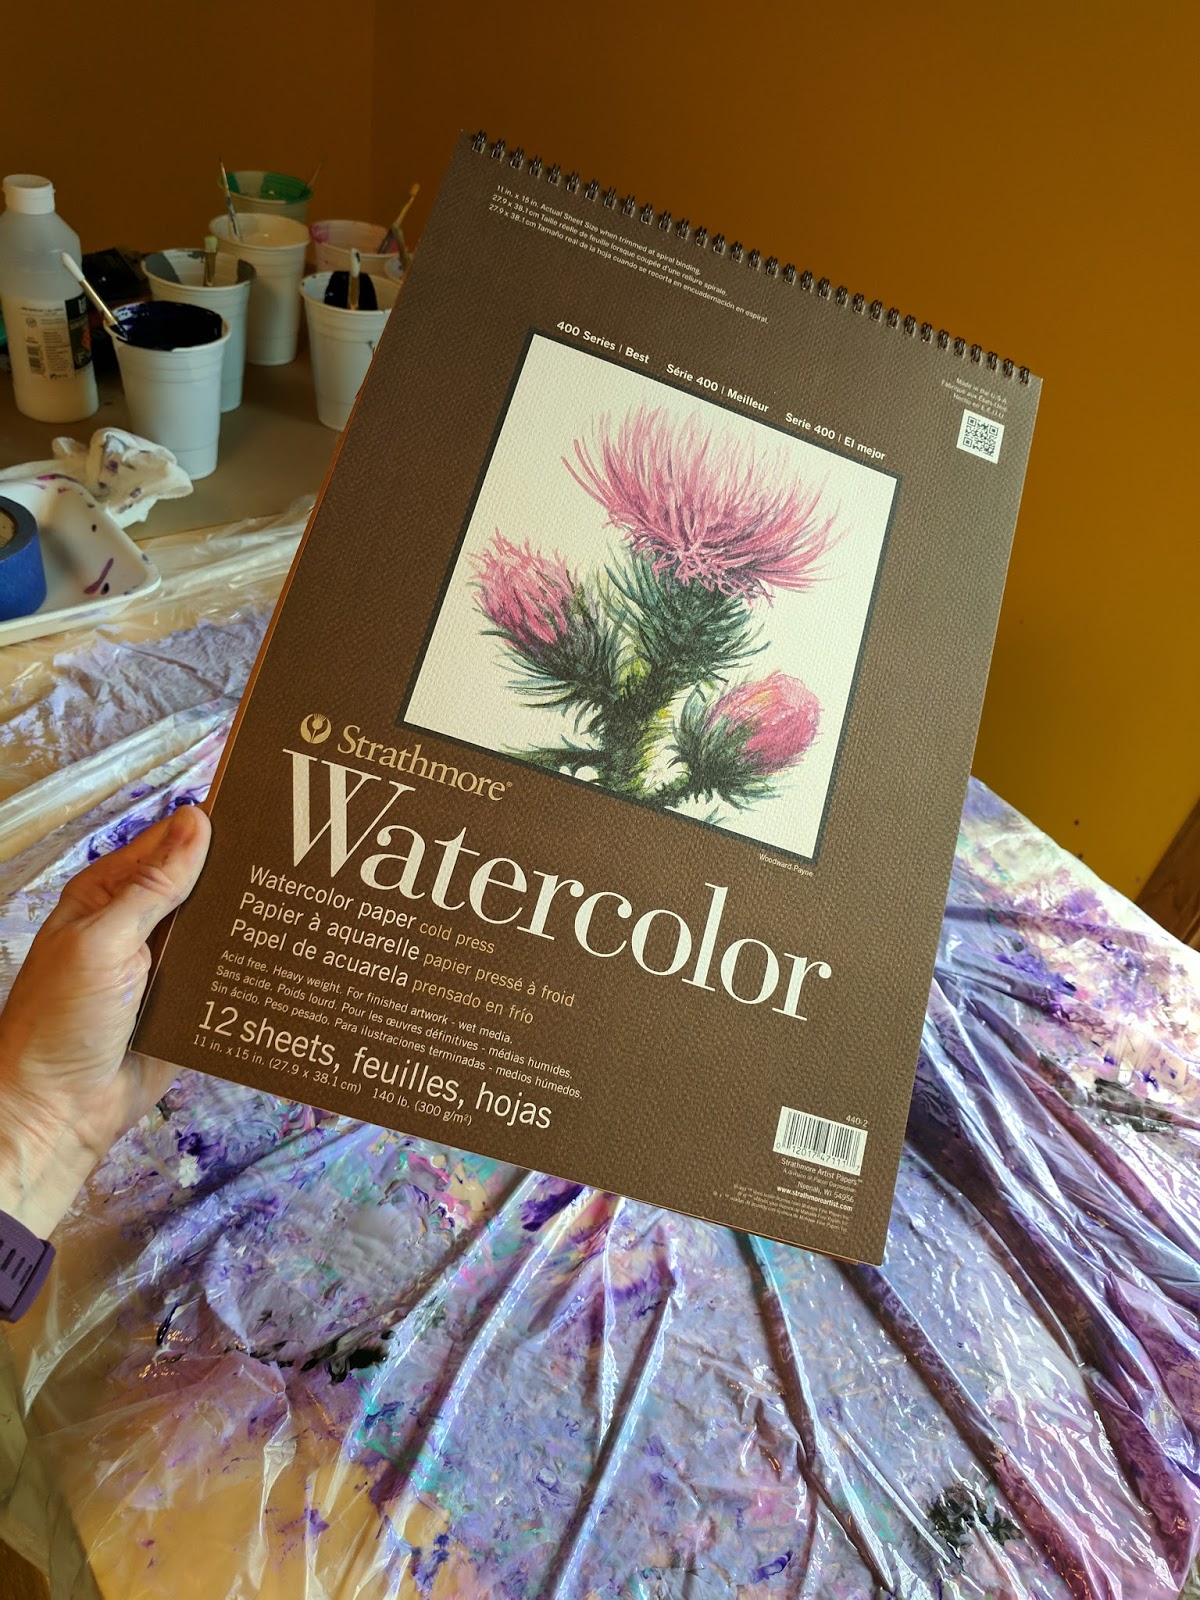
Lastly, technique #4, I used some water color paper to "clean up" all the paint drippings off the plastic work surface.


I just rubbed the page in the paint. These will be used as backgrounds for another project, or even some layers on a greeting card.

I will weight these down to dry flat too!


These are loosely covered to keep dust away while they dry for 3 days. I will check on them Friday and see if they are ready to apply a coat of gloss. Of course, there is a high probability they may get painted over and I will start again!


Until Next Time
~Shari