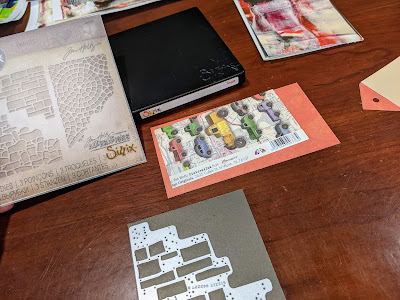
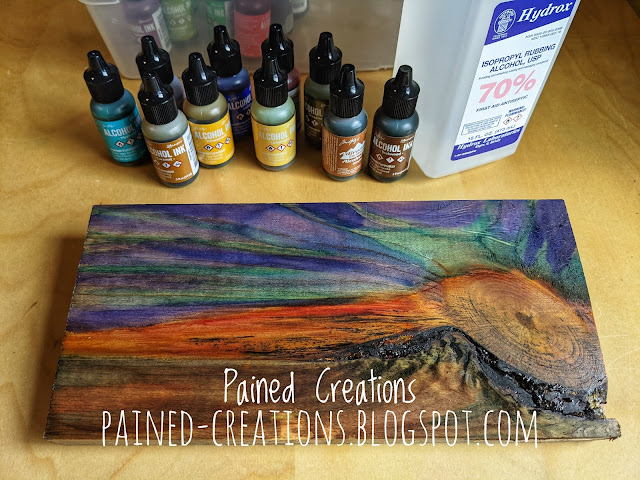
I also grabbed a few more colors while I was playing and tried a different batch of prints. After drying, I was ready to make some cards.
Using art to deal with pain. Trying new things and encouraging others to do the same.
Monday, June 21, 2021
Instagram Reel Attempt
I also grabbed a few more colors while I was playing and tried a different batch of prints. After drying, I was ready to make some cards.
Friday, June 18, 2021
DIY Leftover Wood Sign Project
Once you have done a few household projects, you end up with a stock of leftover wood scraps, opened cans of stain and other goodies like that. Back in 2018, we added a much needed elevator to our home. (needed due to my physical disability). I had stain left over from that, as well as other projects in our home, like these walnut stained crate shelves in our bathroom:
 |
| Not the best photo! Walnut stained crates. |
Anyways, I had plenty of wood and stain, and a problem! The elevator I mentioned, has a door that looks just like all the other interior doors in our home, so people often pull on the handle to go in. Unfortunately, the door locks (to keep people from walking into the elevator pit), and when people try to open it, they usually yank harder trying to get in, when it doesn't immediately open. I decided to make a sign so that people might see it, and ask what door they should open, before the door or hinges get damaged. (we have some strong friends!)
 |
| My elevator with cherry stained cabin. |
I tried my hand at gluing and clamping my wall plaque while Chad was working.
 |
| Treated the wood with wood conditioner, and then alternately wiped all the stain colors across the sign. |
I used 5 of the 6 stain colors I tested. Everything but the ebony stain. I just wiped with the grain and let dry briefly before using the next color, lightest to darkest. I finish with three coats of topcoat.
Next, I gathered all my vinyl sign supplies for my Silhouette (had to buy these because it is my first time using vinyl). I also bought the hubby a keyhole bit for his router to make the groove on the back to hang the sign up, but he is working a lot right now, so this will be finished and hung this weekend.
 |
| Ready to design and cut. |
I used transfer paper to get the vinyl image from the Silhouette page to the wood sign. It was easier than expected! Now that I have some vinyl, I will definitely be making some more things 😃
 |
| I am happy with the way it turned out! |
The letters are slightly crooked, which I knew almost instantly when the vinyl hit the sign, but it doesn't readjust well. Any tips you can share on making sure you get it lined up right on the first try?
Monday, June 14, 2021
Chaise Lounge Chair Made Into A Tool Belt?!?
Yep, you read that right! A few years ago, I solved a problem we had with a chaise lounge chair (shared that recently here). I stored away the leather and planned to do something with it it one day. Well, that day is finally here!
Pinterest is full of ideas, and when I saw a DIY handmade leather tool belt, I knew what I would make with my leftover leather from our chair.
 |
| Pile of leather scraps |
 |
| Rotary Cutter to trim leather scraps |
 |
| I hand sewed the tool belt |
 |
| Leather Tool Belt Detail View |
 |
| Complete DIY Leather Tool Belt |
That is all for today! Off to the vet to get my doggy a check-up. What are you doing today? It is beautiful weather in Chicagoland, so we will be chilling outside for a while after the doggy doc. Enjoy your day, and be crafty!
Saturday, June 12, 2021
DIY Wood Project Part 2 - Wall Shelf
If you missed part 1 of our DIY project, you might want to go check out the Silhouette storage shelf my husband, Chad, built. This wall shelf was another idea I got since we had some lumber leftover. I wanted to store my printer paper and supplies on the wall above the printer, to save the coveted closet shelf space for crafting supplies!
This post will be short, and I encourage you to revisit the link above for more details and see the products used.
I took matter into my own (impatient) hands, and sanded the shelf while the hubby was working.
After wiping it off, I added the wood conditioner, and stained the yellow birch wood shelf with the pickled stain, to match my Silhouette Cameo storage shelf. (The smaller wood item behind the wall shelf is another little project I came up with, and will be a different post soon. I HATE to waste the expensive wood!)
Just needed to wait MANY hours and do all the topcoat layers, and have Chad hang it on my wall. I asked him to use the metal wall shelf brackets we had, partly because I like metal and wood together, but mostly because I am cheap and want to repurpose old stuff we had on hand.
Craft Room Organization
 |
| New matching shelf for office paper and supplies |
 |
| Working on reorganizing craft closet shelves with office supplies gone. |
 |
| I made organization/dividers for my dies from old plastic notebook covers! |
 |
| DIY Wood Marker Storage Unit |
 |
| Paper Storage Cubes |
 |
| 3-Ring Binder with Simple Tabs for Stamp Organization |
Tuesday, June 8, 2021
Honey-Do List DIY Wood Crafting Project (Part 1)
Another One of My Diabolical Plans
When your very old laptop starts to have problems, and you finally decide to upgrade to something new, and then choose a CPU tower rather than another laptop, you may have a problem like I did. My desk is made with a keyboard pull-out shelf, but has filing cabinets on both sides, so there really isn't room to stick a desktop computer tower. My timing is not great, with computer chip delays and very high prices on lumber, but I dreamt up a new DIY project for my honey-do list!
My office/craft room space is full, since I try to not waste any space that could hold more of my crafty stash. 😉 I shoved furniture around a little, and made a 18-inch wide opening between my desk and wood stamp storage unit. I drew up a very rough sketch of my idea for a DIY wood shelf unit that would hold the new tower, plus have a space for the old laptop and my Silhouette Cameo. I will keep using that laptop as long as it lasts, to operate my Silhouette.
With the 3-day weekend Memorial Day quickly approaching, I got my husband to head to Menards with me and find the cheapest variety of hardwood we could buy. He was opposed to this method of wood choosing, but I am cheap. The grain, color and such didn't matter enough to me to spend a lot more. So, we found their selection of "random yellow birch" which came in varied and uneven cuts. This wasn't a problem for the hubby and all his DeWalt woodworking tools. woot woot
We crammed all the lumber into my van and headed home. As a side note, we really miss the work truck. A wheelchair accessible van is great for the purpose it was created, but not so good for long boards of lumber. By this time Chad had drawn more official "blueprints" with correct measurements, and I (not very patiently) waited for the weekend to come.
Memorial Day Weekend Is Finally Here
Chad spent most of Saturday cutting and gluing. I was hopeful that 3 days was long enough to get this project done (BOY, was I wrong!!)! We had our "kids" (28 and 30 years old) and his parents come for lunch and games on Monday. Chad and I always joke about carpenter time. He gives me an estimate of how long a job will take (at home DIY or concrete construction at work). Basically, whatever he says I can just double to get a better estimate! He told me this project wasn't going to be finished this weekend. Aww shucks!
The hubby says he needs more tools! (Weird how this always happens) Guess a router table is on the wish list before the next project. He says doing it this way is much harder.
Monday marks the beginning of day 3, and I am hoping there is enough time to get it finished today. A little more to assemble, then stain and poly. I'm super impatient! More cutting, gluing and sanding today. He is working on the top, slightly wider, shelf that will be where the Silhouette Cameo sits. It needed enough clearance for the 12x12" mat that is cutting to freely travel in one side and out the other as the machine cuts the design.
Going To Take A Little LOT Longer
In the meantime, I choose a color of Minwax (Pickled Oak) stain that we didn't already have and bought a small container. Dug out previously used wood pre-stain conditioner and some poly/topcoat, along with rags and gloves to be ready to work on the finished shelving unit asap. Chad was on a job site that was going to start working 10-hour days, and Saturdays, which was really going to interfere with getting my honey-do list done, but he is awesome! He said he would work on it in the evenings, and get it done by the following weekend.Finally Time For Some Staining
 |
| Board without stain (left) and stained shelf top (right) |
Week Two (or is it really 3??)
 |
| Look at that nice satin shine! |


